Install TallyPrime
Your business and its needs are unique, so TallyPrime is designed to be free of any rigid processes. Your business might need only one installation of TallyPrime for one computer, or it might need multiple installations for many computers in your office network. Accordingly, you can purchase a suitable license of TallyPrime and easily install it in your office. Setup Manager will take care of the installation and basic configuration.
Irrespective of whether you are a new user or an existing user of Tally, we have got you covered! If you already have a version of Tally installed on your computer, then Setup Manager will detect the last installation and help you update to TallyPrime. On the other hand, if you are new to Tally, then the Setup Manager will ensure a smooth installation of TallyPrime.
To install TallyPrime on your computer, you need to have administrator rights. Moreover, your computer must meet the following technical requirements:
-
Operating system (OS)
Microsoft Windows 7 or above
-
Bitness
64-bit applications (for the OS and other applications such as MS Excel, Adobe Acrobat, and so on)
-
Memory (RAM)
A minimum of 512 MB
-
Storage
A minimum available space of 512 MB on your hard disk, cloud location, and so on
If You Are a New User
If you have never installed Tally on your computer, then don’t worry. The Setup Manager will guide you for a quick installation of TallyPrime.
-
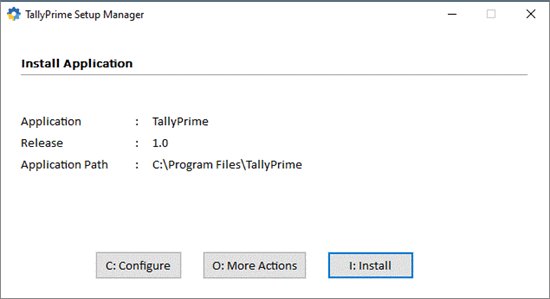
Double-click the setup.exe file. The Install Application screen appears.

-
Press C (Configure) if you want to change the default settings. You can configure the options such as the application path, desktop shortcut, Start menu entry, and so on.
-
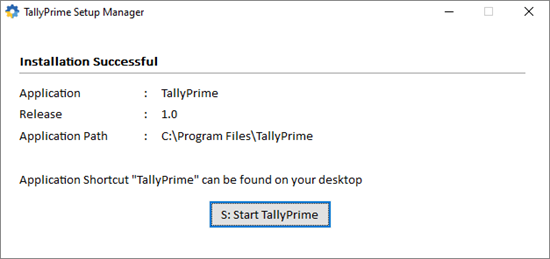
Press I (Install) to continue the installation. After installation, you can see the following screen:

-
Press S (Start TallyPrime) to begin your journey with TallyPrime. If you would like to explore additional options, then press C (Continue Setup).
After installation, you will be asked to configure some basic settings such as the data path, country, and accounting terminology, and so on. These settings will be carried forward on your journey with TallyPrime.
You will see the following welcome screen. Select the appropriate licensing option for your TallyPrime installation.

Once your license is activated, you are good to go!
If you want to explore additional settings, then go to F1 (Help) > Settings from anywhere in the product. Here you can find a host of settings for your license, language, application startup, display, connectivity, and so on.
If You Are an Existing User
If you are an existing user of Tally, then you will feel right at home very soon, as your existing configurations will be carried forward to TallyPrime. The Setup Manager will detect the last installation of Tally on your computer, and help you update to TallyPrime.
-
Double-click the setup.exe file. The following screen appears.
-
Press I (Update), if you want to update your version of Tally (Tally.ERP 9 6.6.3, in this case) to TallyPrime.
Alternatively, you can press O (More Actions) and select one of the following options:
- Install New, if you want to install TallyPrime afresh, without updating your existing Tally application.
- Select Application from Drive, if you think there is a Tally application on your computer that is not listed on the screen. This might happen when the Tally application is copied from one location to another. This option will help you browse your computer and select the suitable folder.
- Press C (Configure), if you want to change the default settings, such as the application path, desktop shortcut, Start menu entry, and so on
- Press I (Update) to continue the installation. You can see the following screen after installation.
- Press S (Start TallyPrime) to begin your journey with TallyPrime. If you would like to explore additional options, then press C (Continue Setup).
-
Press I (Install) to continue the installation. After installation, you can see the following screen:
-
Press S (Start TallyPrime) to begin your journey with TallyPrime. If you would like to explore additional options, then press C (Continue Setup).
If your License was active in the previous installation, then it will continue to be active in TallyPrime. However, if there are any issues in licensing, then you might see the following screen. Select the appropriate licensing option for your TallyPrime installation.
Once your license is activated, you are good to go!
If you want to explore additional settings, then go to F1 (Help) > Settings from anywhere in the product. Here you can find a host of settings for your license, language, application startup, display, connectivity, and so on.


